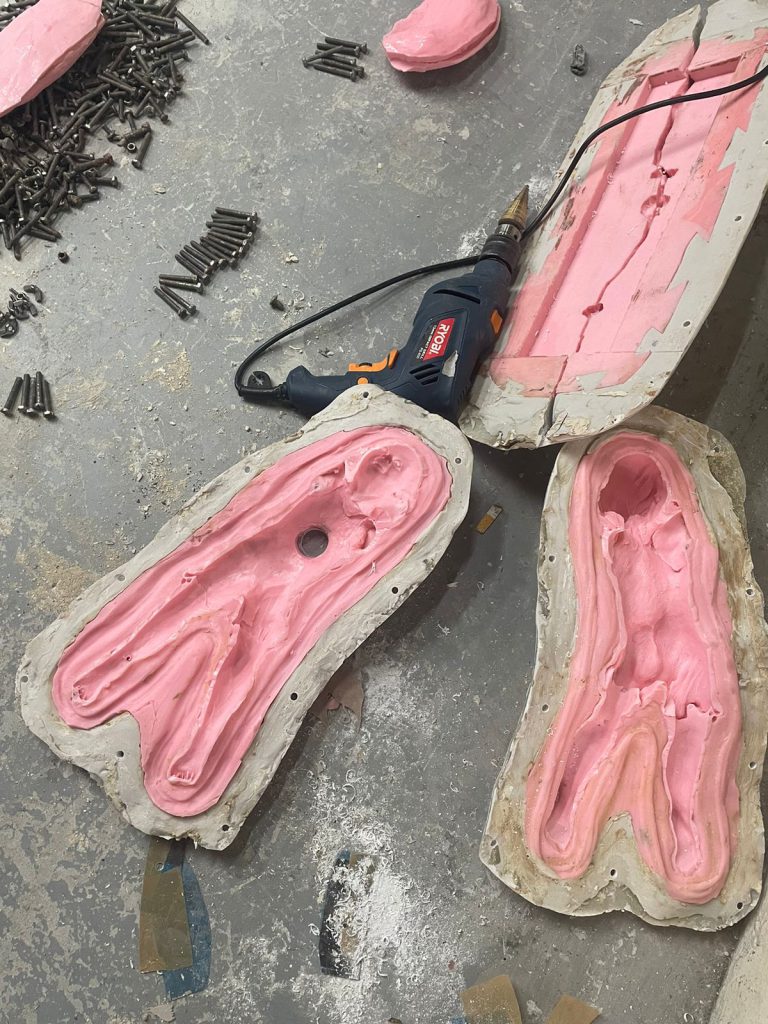
Mold Making
The process of creating a sculpture begins with making a mold. This is done using latex rubber, where four layers of it are applied with resting periods between each layer. The seemline is planned where the mold will split open, and the original sculpture is taken out, leaving the mold jacket. Keys are added to the seemline and 6mm holes are created for screws to provide a seal for the mold. The mold is then coated with resin to create a jacket and maintain its shape.
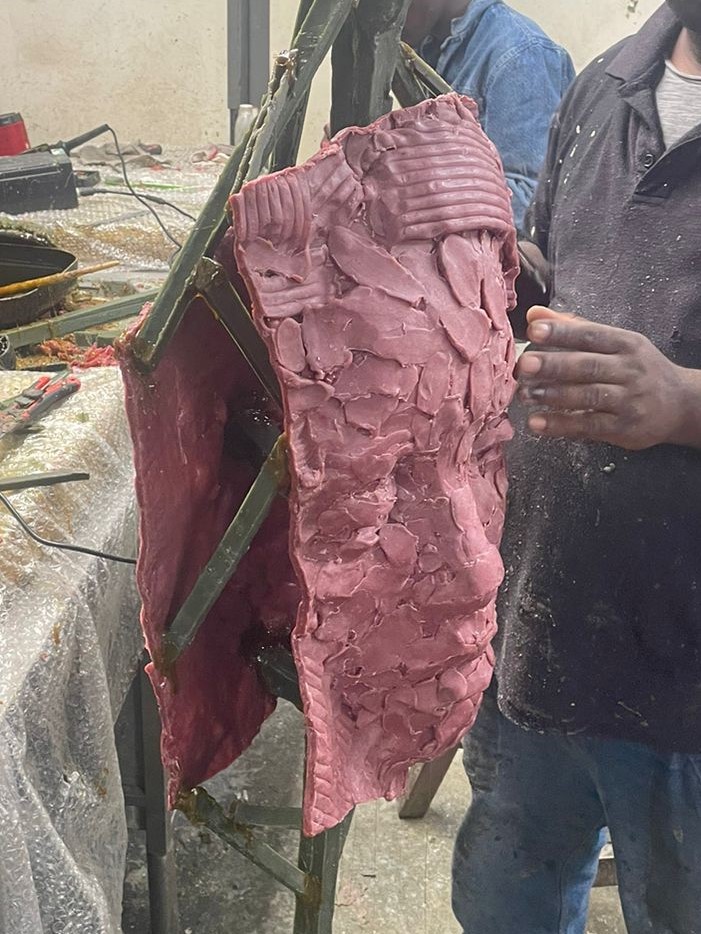
Wax
The wax department involves using hard and soft wax. Soft wax is used to capture the fine details of the original sculpture, and the mold is heated before hot wax is applied with a brush. The wax is reheated to eliminate bubbles that develop in the detail’s recesses. The mold is then closed up, and hard wax is poured into the opening in the mold. The wax is cooled in water, cleaned, and the seemline keys are removed. The wax replica of the original is cut into pieces with a hot knife, and these pieces are gated to a tree with a head, runners, feeders, and risers.
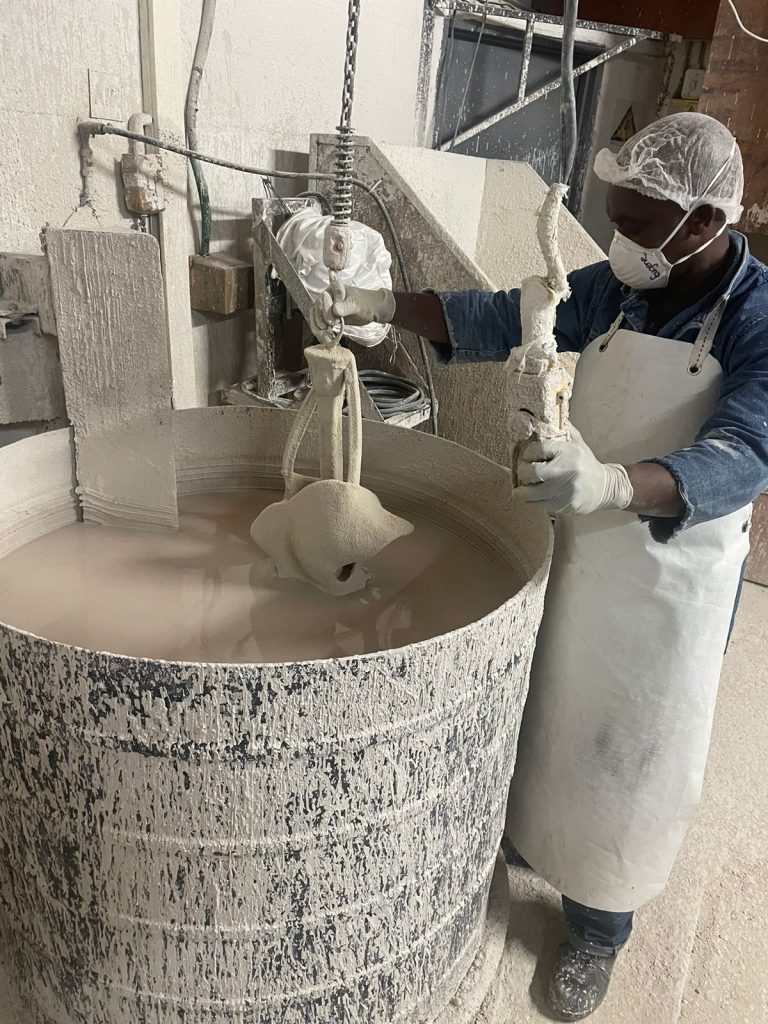
Ceramics
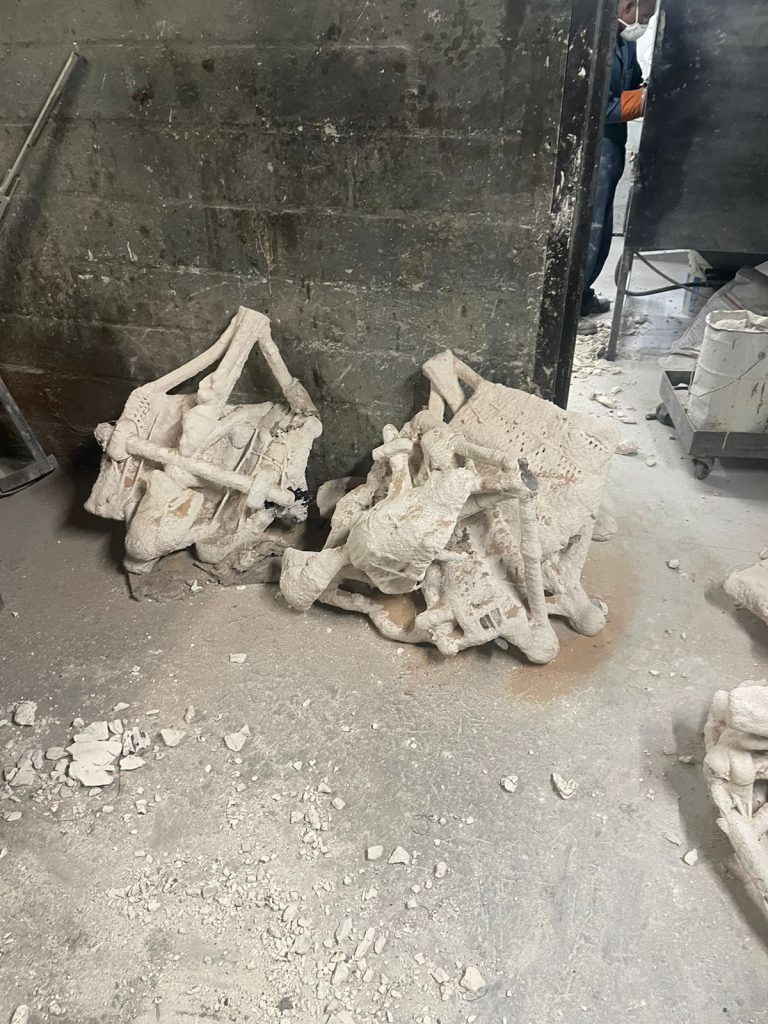
The wax replica on the ‘tree’ is sent to the ceramics department, where it is dipped in layers of ceramic for a week, depending on the sculpture’s size. It starts with a layer, followed by dipping in zircon sand and then fine chamotte to secure the details. Wire mesh is used to reinforce the sculpture, and rough chamotte is dipped three times a day until the required number of layers are achieved. The sculpture is then dipped once more to seal it and left to dry for a day or two in the drying cupboard.
Casting
The cup is cut off and holes are drilled into runners and risers to help with melting the wax out in hot water. The cup is now put into the ‘hut’ to bake for approximately 45min at 650^C. After the cups are cooled, the cracks are patched and pressure tested for holes and cracks again. The cups get placed back into the ‘hut’ to heat up the ‘shell’ where molten metal is poured into the cup and down in the runners, so that it starts filling from the bottom through the sculpture; so the air gets released through the risers. After the metal is left to cool it gets taken out of the ‘hood’ to hammer off the ceramics on the sculpture. Then to clean the sculpture, it will be sent to sand blasting before being taken to the next department.
Fettling
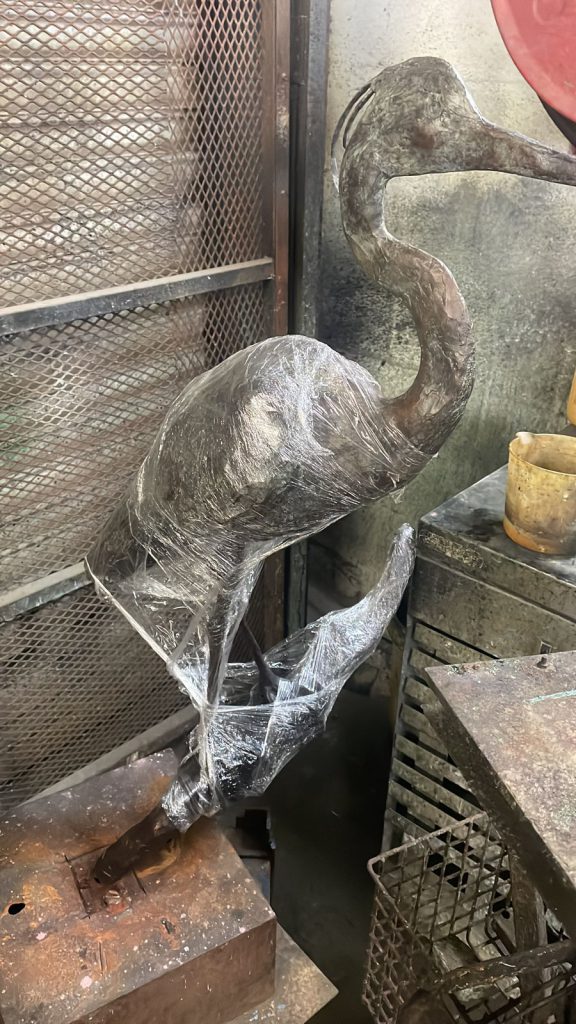
The Fettling department is where the sculpture parts get assembled by wielding, grinding and fettling to put back all details on the wield lines. Once the sculpture is fettled it will be sent to quality control, thereafter all faults will be rectified and then sand blasted again to be prepared for patination.
Patina
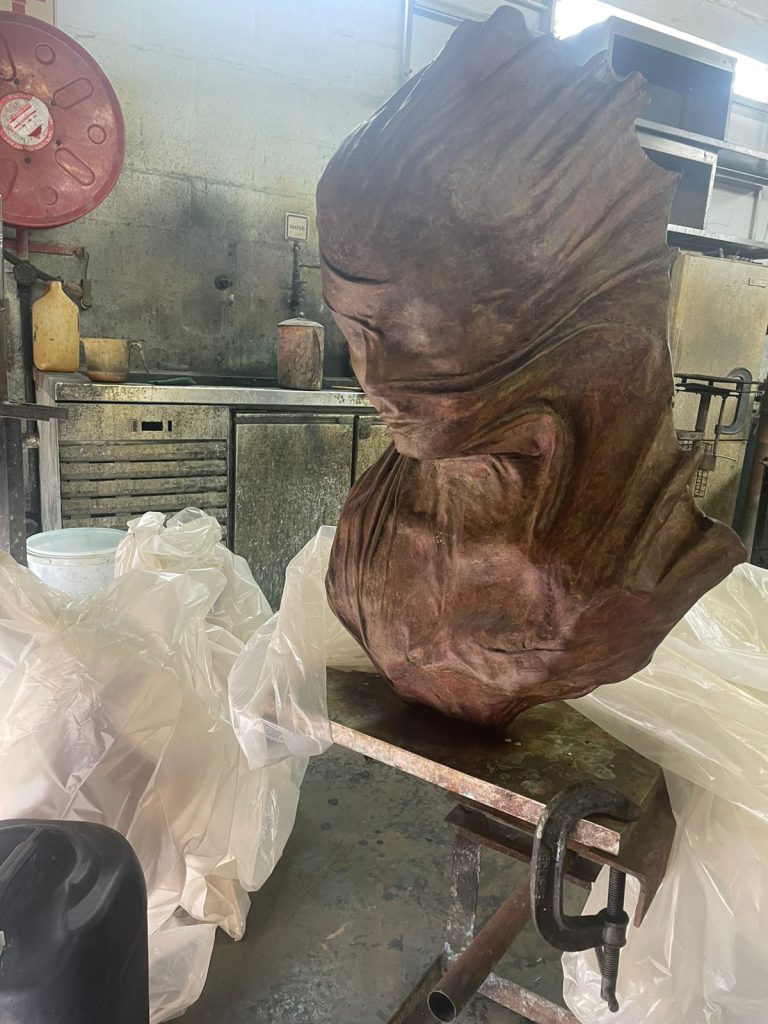
Finally, the sculpture is taken to the Patina department to choose a color, where nitrate salts such as Feric Nitrate, Copper Nitrate, and Silver Nitrate are used. The sculpture is heated up to open up the pores, to burn in the salts. This is used to achieve the desired color. Copper nitrate is neutralized, and the sculpture is given a saturated look and feel. The sculpture gets a wax seal after patination to preserve the patina chemicals.
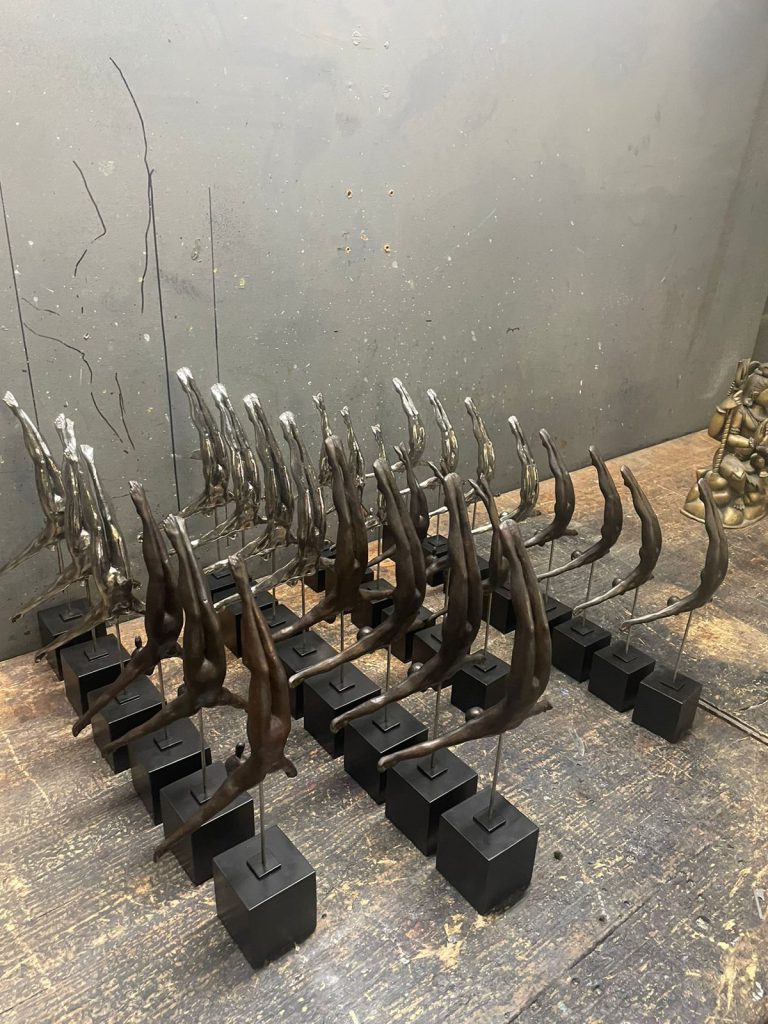
Presentation
Some of the sculptures need a base depending on the clients wish. We offer wood, granite, sand-stone and metal bases, but occasionally we do optical crystal bases that have to be UV bonded to the base.
After Production
The process of creating a sculpture for sale at a gallery involves a number of steps. Once the sculpture is sold, the mold can be used to create a second addition of the same piece, with the number of additions depending on the artist’s preference. To create a smaller or larger addition of the sculpture, the artist can have the original scanned, which saves time and effort compared to starting from scratch. This process involves creating a 3D model of the sculpture, which can then be printed or cut from foam, before being reworked and sent back to the foundry to start the production process anew. By using this method, artists can efficiently create multiple versions of their work without the need for extensive manual labor.